abstract: I show you how you can install Primstar on blender. We have created a short video (exposed left to this text box) which shows the installation process step by step. Further down you find the related text document.
Note: We recommend to use Blender 2.76 You get Blender from its download link
Note: We recommend to use Blender 2.76 You get Blender from its download link
Important for Blender 2.70:
You must install primstar-2-dev-309_blender-2-59.zip or newer. Older Primstar-versions result in installation errors.
- If you already have purchased Primstar you will find all released updates of the software in your Jass-inventory. If you are a new customer, then you can get access to the software via the JASS-shop.
- Download primstar-x-x-x.zip from your Jass-inventory where “x-x-x” denotes the highest release number available in the list.
- Important: Unpacking the zip file will result in installation failures!
Many users have reported that the zip file becomes unzipped during download. Please either ensure that your downloaded file does NOT get unzipped, or zip it again after download completed. Blender needs(!) the zipped file. All attempts to install the unzipped files will fail. - Note for Mac users: Try Right Mouse Click on the download link, then save as… (to be verified)
- Note for all users:We sometimes provide a few releases in parallel. Usually you only need to download the zip file with the highest version number. All older versions are kept available for the case where you find something broken in the newest release. In that case you may switch back to an older release by installing that over your current version (there is no need to uninstall first!)
- Important: Unpacking the zip file will result in installation failures!
- Open blender (possibly as Administrator, see below)
Important: You will add files to the Installation! If you have installed blender to a restricted area (for example on Windows as Administrator into the program directory), then make sure that you open Blender with the same privileges as you had during installation of Blender (on Windows as Administrator) If you have installed Blender to a local folder you do not need Administrator privileges. - Navigate to File -> User Preferences:
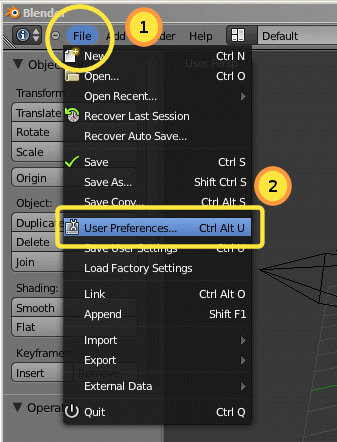
- The User preferences Tab is where you customize blender to your taste. We will add Primstar as follows:
- Proceed to the “Add-Ons” Tab
- At the Bottom of the Tab locate and click “Install Add-Ons…”.
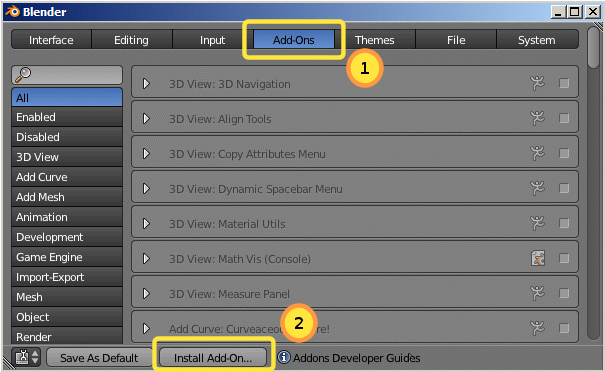
- A file selector opens.
- Navigate to where you have stored the primstar-dev-xxx.zip file:
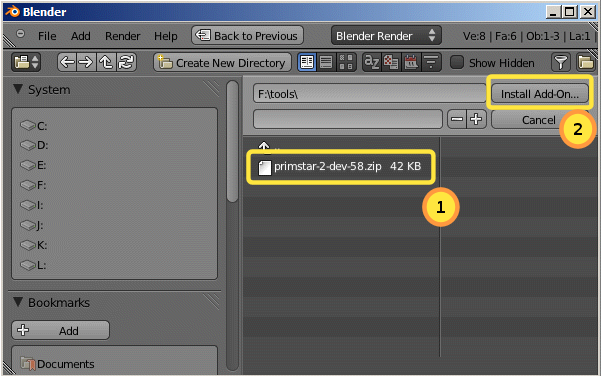
- Select the zip file and Press the “Install Add-On…” button
- Back in the Add-Ons Tab type “primstar” into the search field(1). As you type you will see that the list of displayed modules shrinks and quickly you can find the Primstar-module(2):
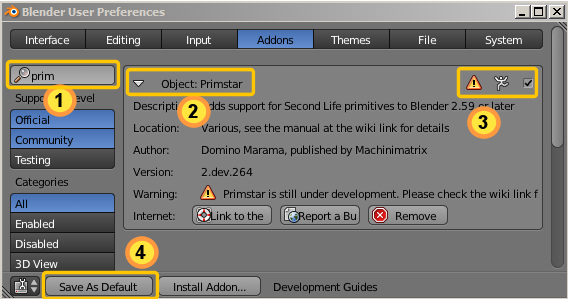
- You now can open the Primstar Entry(2) to see some basic informations about the author and the version of the software. You also find a link to the Primstar-2 Wiki and to the Bug tracker here.
NOTE: We have placed a warning into the module. This warning is only for reminding you that Primstar is still under development and we do not yet guarantee that the system is fit for usage. - To enable the software you must set the checkmark at the top right (3)
- In the last step you save your settings as your new default settings(4)
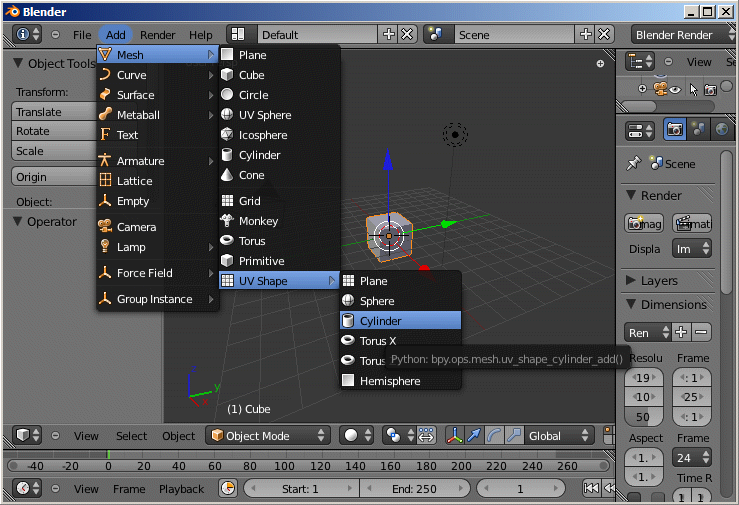
- You can verify that Primstar-2 has been successfully installed by navigating to the new Basic shapes menu in the Add section:
The shapes you see here are the basic sculptmap shapes provided by Primstar-2
