The Sparkles Timeline Copy Tool for timeline ranges with the additional ability to x-mirror all poses in a given time range. The mirror copy feature naturally supports the creation of Walk Cycles.
Define the copy range
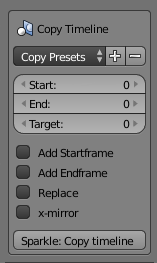
You set the parameters (see below), then press the “Copy Timeline” Button.
End: The last time frame of the copy range
Target: the first time frame of the target range. In our case we copy the range from frame 0-20 into the range from 20-40
Add Startframe: Adds an initial key frame to the first timeframe of the copy range.
Add Endframe: Copies the Start frame of the source range to the last frame of the target range. For walk cycles this terminates the cycle correctly.
Replace: wipes the target range before the copy is done. Thus any key frame in the target range will be removed first.
x-mirror: instead of simply copying the key frames, the pose in each key frame will be mirror copied along the x-axis.
The Presets
For convenience we have created a Walk Cycle Preset. When you call this preset, the fields are populated as follows:
- The Start is set to the startframe of the timeline.
- The End is set to the midpoint of the animation range
- The Target is set to the midpoint of the animation range
- All other options are enabled
Creating a walk Cycle
The Timeline Copy Tool can also be used for creating walk Cycles. Below is a very brief description for how it works
If you do not yet have made any animations with Blender, then please first checkout how to work with the Dope Sheet and with the Graph Editor. You also can take a look into the Avastar documents:
So, now lets go ahead and get something done:
Defining the seed poses
You need two simple poses for the beginning.
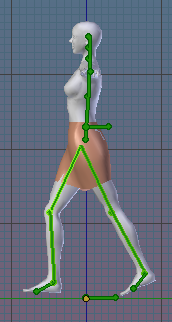
- The Contact Point, that is the moment where both feet are at their maximum distance.
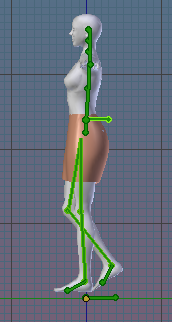
- The Passing Point, that is where both feet are closest to each other.
Place the Contact Point on Frame 0 on the Timeline and place the Passing Point at the first quarter point of the walk cycle. A complete walk cycle with Blender’s default settings takes about 40 time frames, so the first quarter point is in time frame 10.
Some useful hints
- Define the Start and End range of the timeline to match your walk cycle length
- Enable automatic key frame insertion (red button on the lower right corner in the timeline window)
- Take care to place your initial key frame into frame 0. Otherwise you get a small stutter when the cycle switches from the last frame to the first frame.
Now you have already done the hard part. The trick is to mirror copy the 2 key frames to the second half of the walk cycle, that is: copy/mirror paste frame 0 to frame 20 and copy / mirror paste frame 10 to frame 30. Then add the initial frame again to the end of the timeline. Here is where you can copy and mirror paste a single keyframe:
In detail:
- Move the cursor in the timeline to the frame that you want to mirror.
- Copy the keyframe (use the copy tool as indicated in the image above)
- Move the cursor in the tieline to the frame where you want to place the copy
- Mirror paste the keyframe (see image)
And here is where the timeline copy tool can be a huge time saver as it can copy / mirror paste the entire timeline (or parts of it) with a few clicks.


