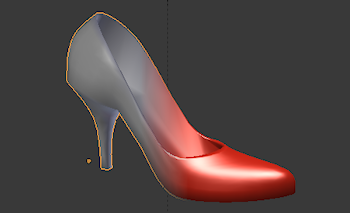
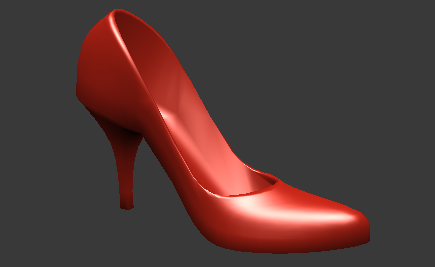
Right click, Save as pump.obj
Abstract: This tutorial is about how to cover a 3D Mesh object with colors, patterns and images to get an appealing look. This process is commonly named “texturing”.

During the course of this tutorial i introduce a very common technique called UV mapping. I will cover only the very basic principles. I will use a Pump as my working object.

Although the tutorial is made with Blender-2.61, most of the content is also applicable to any other mainstream 3D editor.

You can download the pump.obj under the CC BY-SA license.

Video Tutorial

To be done

Content

  • Materials & Lights
  • UV Maps
  • Render & Bake

I eventually want to export my textures to a target system like OpenSim for example and so i will take special care about the process of “baking a texture” and the most common issues with that process.

This initial chapter is about Materials & Lights only. If you are familiar with Blender’s Material system, you can directy proceed to the UV Maps section .


 Warning: This document is work in progress and may contain not verified (or missing) information


Materials & Lights

In our real world the look of an object is the result of an interaction between

  • the materials it is made of
  • and the light sources by which it is illuminated.

Blender tries to mimic the real world situation and thus it provides a simplified version of Materials and Lights with an impressive amount of control parameters.

It is not astonishing that we will also find a Camera in Blender. The camera is used for taking still images as well as entire movie sequences.

The simulation in Blender is not perfect, but it is good enough to give us a very powerful environment for creating virtual scenarios.

The most important material reflection properties are:

  • Diffuse reflection
  • Specular reflection
  • Surface structure

An Experiment

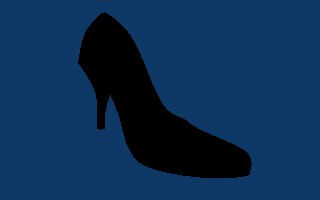
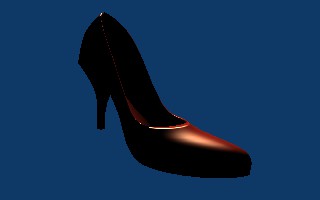
Let us remove the light sources from our scene. Then go into Camera view (Numpad 0) . There adjust either the camera position or the object position until it fills out the Camera view. Finally take a snapshot:

Render -> Render Image  (F12)

The result is a black silhouette as can be seen on the right side. This is almost exactly what we have expected: Because there is no light, the object appears in black.

Note: The dark blue background happens to be Blender’s default sky color.

Hint: To change the default Sky color, go to the World Properties section and change the Horizon Color in the World Tab.

Let there be Light

Let us add a ligth source, take another snapshot and look at the result. Now there is light and we can see the object. But did we really expect that to happen ?

I mentioned before that the object’s look also depends on its materials. But since we have not yet assigned a material to the object how can it interact with light ? So we expect that the shoe still appears black.

The reason why the object appears is: Object with no material assigned to them will be automatically assigned to a default material. Hence the object gets visible as we can see.

Note: The default Blender Material is white with a moderate specularity. The shoe appears so dark, because the light source  is not strong enough to illuminate the scene. We will get back to lights shortly.

Add a Material

So after we have added some light to the scene it is time to define the material for our object. In fact we will add a new material from the Material properties section.

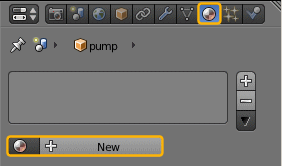
When you enter the material section for the first time, you will see an empty material stack (the grey field in the center of the image to the right). Below that area you find a creation button.

With the creation button you can create new materials (press the Plus sign). Or you can select previously created materials, even materials used in other objects (by pressing the small circle icon left to the Plus sign).

When you have not yet defined a material the material selector will show an empty selection.

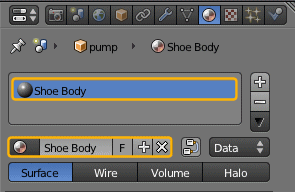
Right after you have created a new Material, the Material stack gets populated. The default name of a new material is “Material.xxx” where xxx is a unique number. You also will see many more control fields appearing below the material creation button. We will get there soon.

Rename a Material

You can rename your material to something recognizable directly within the Material creation button. The material in the Material stack will automatically inherit the Material name change.

Now after we have assigned a material, lets check how the rendering has improved by pressing F12 again. Ok, we see no improvement at all. Why that ?

Its because our new Material uses the exact same properties as the silently applied default material which is used  for objects without material specifications. We will change the material settings now.


Hint: You can create an arbitrary number of materials for your object and assign each material in the material stack to another part of your object. Note that it is not possible to assign 2 materials to the same face(s) of your object.

Hint: You add another Material to the stack as follows:

  • Click on the Plus sign to the right of the material stack to create a new (empty) material entry on the stack.
  • Ensure that the new Material entry is selected (the entry is marked with a blue background)
  • Now add a material from the material selection box (or add a new material as described above)

Color & Reflection

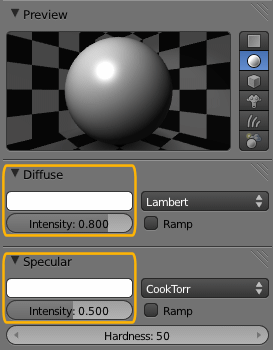
Below the Material creation button you find a previewer which will give you some visual feedback while you change the settings further down.

For now we concentrate on the 2 most apparent attributes:

  • Diffuse
    This controls the diffuse light reflections. In simple words this is the object color. You can change the color and intensity.
  • Specular
    This defines the specular light reflections. You can think of specularity as amount of mirroring of the lights used in your scene. A good example for high specular reflection is plastic and glass. But a sheet of paper for example or cloth materials typically have low specularity.

We leave the shader settings to their defaults for now. We will first examine a simple color change of our material.

The Hardness of the specularity defines the size of the reflection point (small hardness makes this point big and diffuse, while high hardness makes it small and pointy)

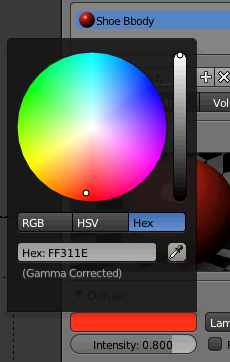
Diffuse Color

Let us colorise the model by setting the Diffuse color to our taste.

Click on the color selector of the diffuse color and select your color from the color palette. I choose a warm red.

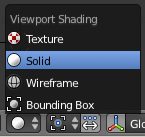
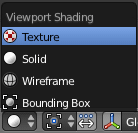
Hint: You can make the object color visible in the 3D view by selecting “Solid Viewpoint Shading” from the Display Type selector:


Another Testrender (F12) shows the colorised model. Please play with the settings a bit and see how different specularity can change your object look significantly.

If you are brave hearted you can also peek into the Shader settings. But i recommend to go one step at a time.

GLSL mode

If your Computer has enough power you can also switch to GLSL mode and see an almost perfect view of your model in the 3D view:

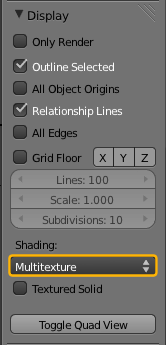
  • Open the Object properties panel
    and locate the Display Tab.
  • Change “Shading:”
    from “Multitexture” to “GLSL”.
  • In the Display Type Selector:
    switch to Draw Type “Textured”:

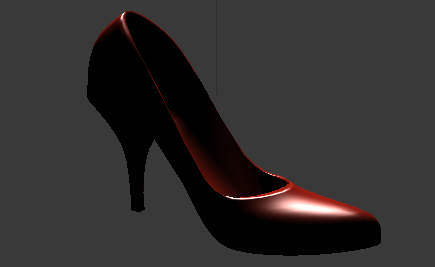
If you have setup everything correct, then your 3D view will now look like shown below.

Lights

What we have so far looks already much better than our starting scene (compare to the top image of this tutorial) But we have one very obvious problem: The image is too dark.

We need to fix that in Blender’s light system:

  • Select the light in the scene (in object mode)
  • Then locate the Object Data properties section.
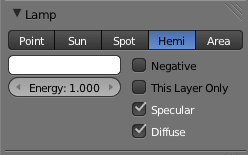
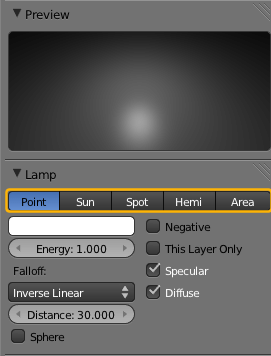
  • And change the Lamp from “Point” (as seen on the right image) to “Hemi” as seen below:

  • It is noteable that a lamp can be customized to emit light of a different color than white, and the light energy (the amount of emitted light)  can also be changed.
  • Also note that Specular and Diffuse can be disabled for each light separately. Although the Specular and Diffuse reflections are Material properties, it is still very handy that these settings can also be controlled per light. Assume for example you wanted to add some fill lights to illuminate dark areas but do not want specular reflections.

Note: Each light type has a different set of property settings. A Hemi light in particular has only very few attributes and thus it is simple to configure it.

Note: For a Hemi light the actual position of the light does not matter at all. Only the emitting angle takes effect. Try to move the Hemi around and then rotate it to see the difference.

The image below is a screen shot made in the 3D view right after i changed the lamp type to Hemi. I have not changed anything else in the setup.

Chapter summary

Here is what we did so far:

  • We added a new Material to an existing mesh object
  • We adjusted the color and specular reflection to our taste
  • We adjusted the light type from Point Light to Hemi Light.

If you are curious you can make another experiment and work out how you can get similar results in your favorite game engine .

You have three options to proceed from here depending on your personal interests: