Basically: All mesh is “mesh”
Whatever you see, rezz or wear in SL is mesh. that is true for prims, sculpties, static mesh, rigged mesh, liquid mesh, fitted mesh, … Its all basically the same:
mesh is a set of vertices (locations in space) connected by edges.
A set of adjacent edges is an edge loop and when an edge loop is closed (last edge is connected to first edge of a loop) then this is a closed edge loop.
finally the space surrounded by a closed edge loop can (but does not need to!) define a face. And faces can be mapped to textures. basta. No more no less.
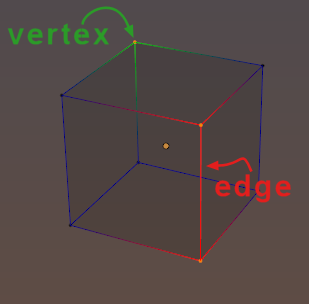
A simple example of a mesh
So why do we talk about different kinds of mesh when everything is mesh ? This is because Mesh can be created in different ways and it can be used in different ways.
Static mesh (rigid mesh)
Prims
+ Very simple to define and use.
– Unflexible
+ Arbitrary shapes can be created
– the amount of effort to create a good Mesh is much higher than with Prims
Animated Mesh (using Skeleton Animation)
Liquid Mesh
Fitted mesh
+ Can be used for more realistic animations when worn on Avatars
– You need a lot of experience to create a good rigged mesh
Parametric Mesh
While mesh can be defined vertex by vertex, edge by edge, face by face, there is one special sort of meshes that is defined by rules. Second Life supports two sorts of parametric meshes:
Prims: are predefined shapes (Cube, Cylinder, Sphere, Torus) which can be modified by parameters (size, cut, path, etc…). Prims can be combined to create more complex arrangements. Prims where the primary building objects used for over a decade to create the Second Life environments.
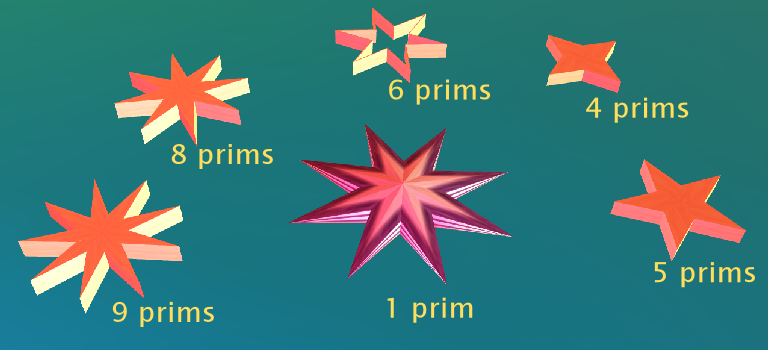
note the dark red object in the center is a Sculpted Prim, see below)
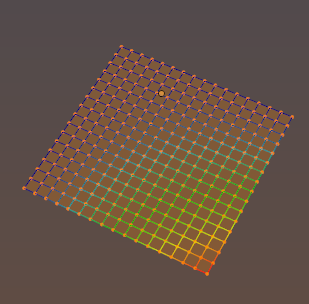
Sculpted Prims: A Sculpted Prim is a rectangular mesh plane that is modified by a displacement map (the Sculptmap). The Mesh part of a sculpted Prim is the same for any sculpted prim in the world: Its just a grid of interconnected vertices as shown in the image.
The Sculptmap contains a 24 bit RGB color for each vertex of the mesh plane. The RGB color is not used as a color but as a set of coordinates where
- R maps the first byte of the color to the x-axis
- G maps the second byte of the color to the Y axis
- B maps the last byte of the color to the Z Axis
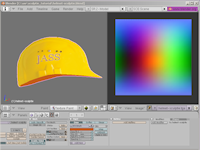
A simple Sculpted Prim hat
Rigged Mesh
When you want to animate a mesh, then one (the most?) popular method to do this is by defining a rig (a skeleton made of Bones) and animate this skeleton. Then define a relation between each bone and each vertex of a mesh (a Mesh Weight Map) that defines how the motion of a bone influences the motion each vertex.
In Second Life we have exactly one rig, the “SL Skeleton”.
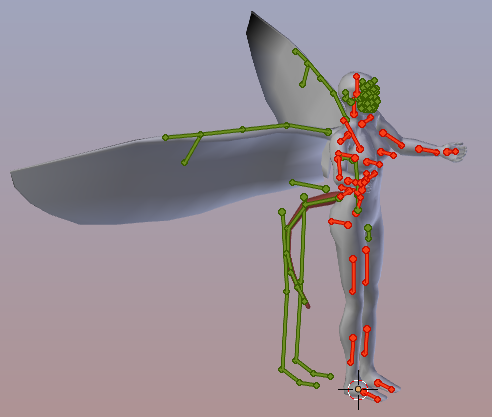
The SL Skeleton contains the following set of bones:
- 26 Classic Body bones (feet, legs, arms, torso, head)
- 26 collision Volume Bones (Collision Volumes, nowadays also named cBones)
- 42 Face bones
- 30 Hand bones
- 6 Tail bones
- 9 Hind bones
- 11 Wing Bones
- 4 Extra Spine bones
- 1 Groin bone
Bone is not Bone
While all bones are implemented in the same way, they are actually used for different purposes:
mBones: are used for animating the location and rotation of mesh vertices. But mBones never intentionally change the Volume (scaling) of a mesh part.
cBones: Are used for defining a primitive representation of the SL Avatar to calculate collisions of the character with the environment. Each Collision Volume is clamped to a related mBone (cBones are children of mBones), so the collision volumes move along with their parent mBones.
Collision Volumes also follow the volume changing sliders in the avatar shape editor. Thus they inflate/deflate along with the shap definition. But cBones have no(!) influence on the SL Avatar’s shape!
However, about 2 years ago red Poly (and maybe some others as well) detected that cBones actually can influence rigged meshes when using a simple trick, that is when the creator adds weight maps for the cBones. As a simple picture imagine the cBones are balloons placed under the skin and changing the cBone volumes result in inflating/deflating the nearby parts of the mesh.
Liquid Mesh and Fitted Mesh
To tell you the truth right away: Liquid Mesh and Fitted Mesh are buzz words. The only reason why they exist has to do with history:
The term “Liquid Mesh” was invented by RedPoly and friends (i think) shortly after the method was detected 2 years ago. By then the SL Avatar had 19 cBones and these cBones have been used all the time for making adjustable meshes. But LindenLab never approved LiquidMesh as an official rigging feature.
In November-2014 LindenLab finally decided to use the CollisionVolumes officially as replacement (alternative) for the mesh deformer which by then was around for almost 2 years as well (and favored by many because of its apparent ease of usage).
And for some unknown reason the technique was suddenly renamed to “Fitted mesh” (Maybe because the term “Liquid Mesh” was copyrighted by the original inventor. The only addition that was made (as far as i know) is the invention of 7 additional cBones (BUTT, Left/Right PECS, Left/right HANDLES, UPPER/LOWER BACK )
Fitted Mesh and Physics
The new Collision Volume Bones have been attached to the Avatar physics system. That means, fitted mesh can simulate gravity, and now Mesh characters can have bouncing boobs and butts.
Fitted Mesh and 3D Tools
In principle any serious 3D Tool should be able to support weighting and animating with Collision Volumes. However there are a few caveats to be taken into account
- The most problematic property is that cBones use the Bone Scale value to define the amount of influence on the Shape volume. But due to the original purpose of Collision Volume Bones the scale factors are a bit weird. Especially the scale factors are not neutral for the neutral mesh. this is because:
- The SL Avatar is not bound to rest pose. That is the neutral pose of the mesh character (where the mesh is not influenced at all by the bones) is not the same as the Rest pose of the SL Rig. this bears a whole lot of issues in it
Fitted Mesh and Blender
Blender does not support rigging to a “bind Pose”. This was never a big problem with mBones, because the “default character” was always distributed in SL Rest pose. Hence we where always working with the neutral mesh and all scale factors have always been set to <1,1,1>, exactly as it is needed by Blender.
For cBlones the situation is massively different. If you have been trying out fitted mesh with Blender 2,69 or older you will have seen the “spaghetti avatars” which display the meshes as very thin lines connecting the hands, head and feet. This happened because the scales are not <1,1,1> in the neutral pose.
This issue happened to be a problem since day one and up until blender 2.69. Only with Blender 2.70 this particular problem has been solved by adding a special treatment for Second Life right into the Blender Collada exporter. But you have to provide the Bone Scale values for your mesh(es) the Blender demo meshes already contain these values. Please take a look at
Fitted Mesh and Avastar
Avastar has been working with Liquid Mesh almost since day one and since Avastar comes along with its own Collada exporter we have added Bind pose support for cBones. that is, cBone scales have always been treated in the right way, hence you can use all recent Blender versions to make Fitted Mesh provided you have Avastar installed.
Pure Blender Setup
If you want to keep with a pure Blender, then you will want to do this:
- Install Blender 2.70 or newer
- load either the Fitted Mesh demos from LindenLab or the demos from our Blog.
Please also check the fitted mesh survival kit. On this page we describe how you can create your fitted meshes from scratch without need to use the templates in the survival kit as starting point.