This page is outdated. Please proceed to our new documentation page:
https://avastar.online/help/rig-transfer-tool/update/
Purpose
You want to update a project that was made with an older version of Avastar to the newest available Avastar.
Basic workflow
This is the most basic process for upgrading an older Avastar Rig. A typical usage case is when you have created Mesh attachments by using a previous version of Avastar. This applies only to projects where you used the Avastar Sliders to change the Shape. And you did not edit the Rig itself.
Migrate Human character from older version of Avastar
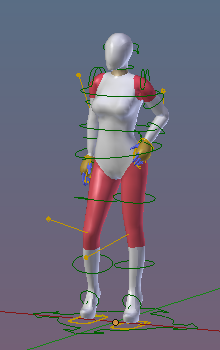
- Load your old Avastar Project into the scene.
- Select the Avastar Armature.
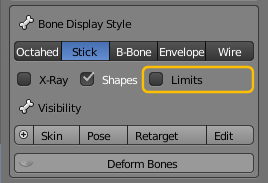
- Open the Tool shelf and there open the Avastar Tab.
- Locate the Avastar Tools panel.
- Ensure that the Keep Meshes option is selected
- Keep Transfer Joints deselected. (See also alternative workflow below).
- Click Update Avastar.

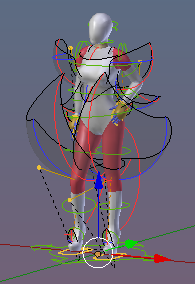
The conversion takes a few seconds. When it is done, then:
- The workbench Armature has been replaced by an Avastar Armature
- The Workbench Character has been replaced by an Avastar Character.
- Your custom mesh has been bound to the Avastar Armature.
- Your Custom mesh has been adjusted to the Avastar Character.
Note: If you are upgrading from a very old Avastar rig, then you might see visual differences in the Rig. For example we have separated the eye target into its own Bone set, so it might become hidden after upgrading. However, if you think the upgrade does strange things, please report!
Alternate Workflow
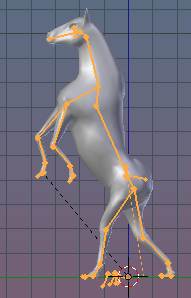
Migrate Non Human character from older version of Avastar
- Load your old Avastar Project into the scene.
- Select the Avastar Armature.
- Open the Tool shelf and there open the Avastar Tab.
- Locate the Avastar Tools panel.
- Select the Delete Meshes Option (you do not need the Avastar meshes for your non human character).
- Enable Transfer Joints.
- Click Update Avastar.

The conversion takes a few seconds. When it is done, then:
- The workbench Armature has been replaced by an Avastar Armature
- The original Avastar Character has been remmoved
- Your custom mesh has been bound to the Avastar Armature.
- Your Custom mesh has been adjusted to the Avastar Character
Also note that if you plan to use IK with your Custom mesh, then you might need to adjust Avastar’s IK Bones manually. Also Bone rolls are transferred as they are defined ion the source Armature.