|
|
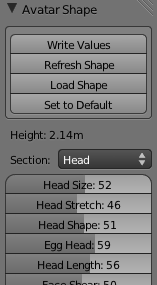
Avastar has most of the same shape control sliders as you will find in SL and you can import your shape from SL to Avastar. When you first add an avatar or load a blend file you will see only a single button “Load Shape UI” which will load the UI after a few seconds. The UI has a set of buttons to write out the slider values, to load a shape and to refresh the shape, then an approximate indication of the avatar height followed by a section selector and sliders for that section. The sections are the same as in SL: Body, Head, Eyes, Ears, etc. Moving a slider will adjust the shape in real time and this can be done in any posture. |
All the settings that affect the shape of the mesh or bones are represented including settings for hair, clothes and shoes. Some controls in SL affect alpha masks or textures, these are not implemented in Avastar. When you are creating animations be aware that they will depend on the shape, to get really accurate animations you have to match the shape in Blender and SL.
Importing a Shape (from SL)
- The first step is to export your shape from SL to an xml file. You need to have access to the Advanced menu (Develop menu in Firestorm) and choose Avatar > Character Tests > Appearance To XML. Nothing obvious will happen but a new file will be created in your viewers directory: character/new archetype.xml.Important:If you are on Windows and if you have installed your viewer to the default location (under Program files), then you might not have sufficient permissions to create the archetype.xml file. If the file is not created, then restart the viewer with admin permissions (right click on the viewer icon-> run as admin)
- From Avastar click Load Shape an select the xml file. Your shape from SL is now in Blender!
Exporting a Shape
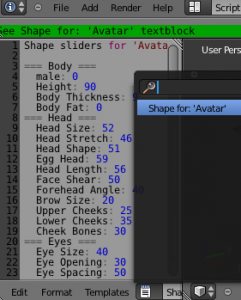
This is not so convenient as there is no direct shape importing to SL in any viewer that we know of. Clicking Write Values will write out the slider values to a new text block. If you switch to the scripting layout or any layout that has the Text Editor you should find the values from the text menu. These will be arranged by the same sections as in SL.
In SL you now need to spend a few minutes setting these values by hand on a new shape. This is a little tedious but seems to be the only way unless some TPV adds a function to import a shape.
Tips for Creating a Great Shape
SL’s controls tend to be difficult to work with and many controls can affect the same parameters such as height. Don’t shy away from using reference figures to get the proportions right.
You can set a background picture to a view using the tools in the 3DView properties panel under Background Images. There you can select, scale and position an image that will appear behind the scene when the view is in one of the projections (Front View, Right View etc).
Alternatively you can add an Empty object (while in object mode) then select Image from the Display control in the Object Data tab of the Properties editor. The object can then be placed and scaled using the usual controls.
Either of these two techniques will give you reference images you can compare against while fixing proportions and features. Moving the sliders will change the shape real time, if you his ESC then the change is discarded.
Create a sequence of postures, one per frame, then by using the arrow key you will be able to switch between them as you are editing. 
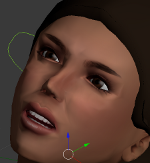
You can adjust the facial expressions within the Expressions pane and you can add a skin texture to the model in Blender (you can add the same texture as you would use in SL if you own the source files). Ultimately you will probably want to edit a skin / shape combination as the texture and shape affect each other.
Resources
- A Matter of Proportion. An excellent introduction to body proportions and applying them in SL by Penny Patton.

