Setup Nginx, php-fpm and MariaDB
Now we will set up Nginx, PHP-FPM and MariaDB, which will form the foundations of a working web server. I assume you are still logged in on the server.
Installing apt-common tools
This package is included in the Ubuntu distribution, but not in the Debian Jessie distribution. We will add it now:
sudo apt install software-properties-commonNow we are ready to install the Webserver…
Installing Nginx
Although the package manager (apt) has access to Nginx packages, they’re often outdated and only give you access to the stable branch. It’s recommended that most servers run the mainline version, which receives move regular updates (including minor bug fixes and new features). This article explains the difference between the two branches in more detail, but generally speaking, if you don’t plan on using any third party Nginx modules the mainline branch is the way to go.
First add the repository containing the mainline version and update the package lists:
sudo add-apt-repository ppa:nginx/development -y
sudo apt update
Then install the package:
sudo apt install nginx -y
Once complete, you can confirm that Nginx has been installed with the following command:
sudo nginx -v
By now you might have installed apache webserver (by default) and the nginx server in parallel. If this is the case for your server installation, then you may want to change the default settings. And since we want to use nginx as our webserver, we will assign a non standard port to the apache server:
sudo vi /etc/apache2/sites-enabled/000-default.confNow change the port that is used by the default host from 80 to something different. WE will use 81 here. Search for the line:
<VirtualHost *:80>and replace it with
<VirtualHost *:81>cd /var/www/html
sudo mv index.html index.html.hide
ls
Now restart the apache2 service (or stop it if you prefer)
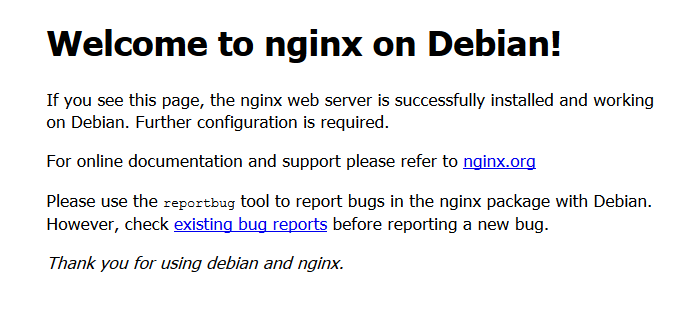
sudo service apache2 restartand check if all is well by visiting your server’s Fully Qualified Domain Name (FQDN) in the browser. You should see an Nginx welcome page:
Configure Nginx
Now that Nginx has successfully installed it’s time to perform some basic configuration. Out of the box Nginx is pretty well optimized, however there are a few basic adjustments to make. But, before opening the configuration file, you need to determine your server’s number of CPU cores and the open file limit.
Enter the following commands and make note of the return values:
grep processor /proc/cpuinfo | wc -l
ulimit -n
We see that in our case the server has 10 cpu’s and the file limit is 65536. We will need to configure this and soime more options: Open the Nginx configuration file, which can be found at /etc/nginx/nginx.conf:
sudo vi /etc/nginx/nginx.conf
Now the nginx configuration file opens and you can begin to modify the settings:
user gaia;
Start by setting the user to the username that you’re currently logged in with. This will make managing file permissions much easier in the future, but this is only acceptable security-wise when running a single user access server.
worker_processes 10;
The worker_processes directive determines how many workers to spawn per server. The general rule of thumb is to set this to the amount of CPU cores your server has available. In my case, this is 1.
The events block contains 2 directives:
worker_connections 65536;
the first worker_connections should be set to your server’s open file limit. This tells Nginx how many simultaneous connections can be opened by each worker_process. Therefore, if you have 2 CPU cores and an open file limit of 1024, your server can handle 2048 connections per second. However, the number of connections doesn’t directly equate to the number of users that can be handled by the server, as the majority of web browsers open at least 2 connections per request.
multi_accept on;
The multi_accept directive should be uncommented and set to on, which informs each worker_process to accept all new connections at a time, opposed to accepting one new connection at a time.
keepalive_timeout 15;
Moving down the file you will see the http block. The first directive to change is the keepalive_timeout, which by default is set to 65. The keepalive_timeout determines how many seconds a connection to the client should be kept open before it’s closed by Nginx. This directive should be lowered as you don’t want idle connections sitting there for up to 65 seconds if they can be utilised by new clients. I have set mine to 15.
server_tokens off;
For security reasons you should uncomment the server_tokens directive and ensure it is set to off. This will disable emitting the Nginx version number in error messages and response headers.
client_max_body_size 64m;
Underneath server_tokens add the client_max_body_size directive and set this to the maximum upload size you require in the WordPress Media Library. I chose a value of 64m.
Further down the http block you will see a section dedicated to Gzip compression. By default, Gzip is enabled but is disabled for Microsoft Internet Explorer 6, however you should tweak these values further for better handling of static files.
gzip_proxied any;
First, you should uncomment the gzip_proxied directive and set it to any, which will ensure all proxied request responses are gzipped.
gzip_comp_level 2;
Secondly, you should uncomment the gzip_comp_level and set it to a value of 2. This controls the compression level of a response and can have a value in the range of 1 – 9. Be careful not to set this value too high as it can have a negative impact on CPU usage.
gzip_types
Finally, you should uncomment the gzip_types directive, leaving the default values in place. This will ensure that JavaScript, CSS and other file types are gzipped in addition to the HTML file type.
Now store the configuration and exit the editor.
Configure fastcgi_parms
In order for Nginx to correctly serve PHP you also need to ensure the fastcgi_param SCRIPT_FILENAME directive is set, otherwise you will receive a blank white screen when accessing any PHP scripts. Open the fastcgi_params file:
sudo vi /etc/nginx/fastcgi_params
Ensure the following directive exists, if not add it to the file:
fastcgi_param SCRIPT_FILENAME $document_root$fastcgi_script_name;
That’s the basic Nginx configuration dealt with, hit CTRL X followed by Y to save the changes. For the changes to take effect you must restart Nginx, however before doing so you should ensure that the configuration file contains no errors by issuing the following command:
sudo nginx -t
If everything looks ok, go ahead and restart Nginx:
sudo service nginx restart
If everything worked out ok, you should still be able to see the Nginx welcome page when visiting the FQDN in the browser.
Curl
curl is used to download content from the internet. We will need this tool in the next step when we install php7 (see below). However installing curl is easy enough:
sudo apt install curl
PHP-FPM
Php5 seems to be the most used php version, but we learned that PHP7 is about 30% faster so we will give it a try. Unfortunately php7 is not always included in the default Debian repositories. So, if you are working on debian-8 you have to get the packages from dordeb.org
For debian-8
We have to grep the necessary packages from an ubuntu repository. This is actually a bit fuzzy, so please check if you want to take this risk before you go ahead. Also, when you consider to do it, then note taht here is one situation where sudo seems to be not working. So we have to login as root user to get the next steps working:
su - root

sudo echo 'deb http://packages.dotdeb.org jessie all' > /etc/apt/sources.list.d/dotdeb.list

curl http://www.dotdeb.org/dotdeb.gpg | apt-key add -

apt update
Now logout from root and then install php-7.0 using sudo:
sudo apt install php7.0-fpm php7.0-common php7.0-mysqlnd php7.0-xmlrpc php7.0-curl php7.0-gd php7.0-imagick php7.0-cli php7.0-dev php7.0-imap php7.0-mcrypt -yFor debian-9
Here the installation is very straight forward and simple:
sudo apt install php-fpm php-common php-mysqlnd php-xmlrpc php-curl php-gd php-imagick php-cli php-dev php-imap php-mcrypt -y
After the installation has completed, confirm that PHP has installed correctly:
php -v

If you use xmlrpc then you also need to install the php-xml package:
sudo apt install php-xml
Now that PHP has installed you need to configure the user and group that the service will run under. Because the server isn’t designed for a shared hosting environment, it’s ok to run a single PHP pool under your user account. Open the default pool configuration file:
sudo vi /etc/php/7.0/fpm/pool.d/www.conf
Change the following lines, replacing www-data with your username:
user = www-data
group = www-data
listen.owner = www-data
listen.group = www-data
And store the changes.
Next, you should adjust your php.ini file to increase the WordPress maximum upload size. Both this and the client_max_body_size directive within Nginx (see further up in this document) must be changed in order for the new maximum upload limit to take effect. Open your php.ini file:
sudo vi /etc/php/7.0/fpm/php.iniChange the following lines to match the value you assigned to the client_max_body_size directive when configuring Nginx:
upload_max_filesize = 64M
post_max_size = 8M
Save the configuration and start (or restart) PHP using the following command:
sudo service php7.0-fpm restart
Now that Nginx and PHP have been installed, you can confirm that they are both running under the correct user by issuing the top command:
top
If you hit SHIFT M the output will be arranged by memory usage which should bring the nginx and php-fpm7.1 processes into view. You should notice a few occurrences of both nginx and php-fpm. Both processes will have one instance running under the root user (this is main process that spawns each worker) and the remainder should be running under the username you specified.
If not, go back and check the configuration, and ensure that you have restarted both the Nginx and PHP-FPM services:
sudo service nginx restart

sudo service php7.0-fpm restart
MariaDB
The final package to install is MariaDB, which is a drop in replacement for MySQL. We have choosen MariaDB because it offers more features and speed improvements over MySQL. It’s also fully open source and has been adopted by a number of large companies. Again, the apt repository does contain a MariaDB package, but it’s not the most recent stable release.
To install MariaDb, issue the following command:
sudo apt install mariadb-server -y
You’ll be prompted to enter a root password, which should be complex, as described at the end of the previous post.
Once MariaDB has installed, you need to setup the default system tables:
sudo mysql_install_db
The last step is to secure MariaDB. Luckily, there’s a built in script which will prompt you to change a few insecure defaults:
sudo mysql_secure_installation
You will be prompted to enter the root password you created in the previous step and will be given the option to change this password if you are not happy with it.
A number of additional prompts will appear, you should accept the default values by hitting ENTER.
Catch All Server Block
The last thing to address in this post is to remove the default server block from Nginx. Currently, when you visit the server’s FQDN in a web browser you should see the Nginx welcome page. However, unless visiting a known host the server should return a 444 response.
Begin by removing the following file:
sudo rm /etc/nginx/sites-enabled/default
Now you need to add a catch all block to the Nginx configuration. Using nano, open the nginx.conf file:
sudo nano /etc/nginx/nginx.conf
Towards the bottom of the file you’ll find a line that reads:
include /etc/nginx/sites-enabled/*;
Underneath add the following:
server {
    listen 80 default_server;
    listen [::]:80 default_server;
    server_name _;
    return 444;
}
Hit CTRL X followed by Y to save the changes and then test the Nginx configuration:
sudo nginx -t
If everything looks good, restart Nginx:
sudo service nginx restart
Now when you visit the FQDN you should receive an error.
<image>
We will customize the Nginx configuration further to improve both performance and security, but what we configured by now should serve as a good starting point.
Next we will guide you through the process of setting up your first WordPress site and how to manage multiple WordPress installs.