Cron
WordPress has built-in support for scheduled tasks, which allows certain processes to be performed as a background process at designated times. Out of the box WordPress performs the following scheduled tasks:
- Automatic updates which are pushed out by the WordPress core team to fix security vulnerabilities.
- Check WordPress is running the latest stable release.
- Check for plugin updates.
- Check for theme updates.
- Publish any posts scheduled for future release.
However, the cron system used by WordPress isn’t the most performant or accurate of
implementations. Scheduled tasks within WordPress are triggered during the lifecycle of a page request, therefore if your site doesn’t receive any visits for a set period of time, no cron events will be triggered during this time. This is also true of sites that use full page caching, such as Nginx FastCGI, which was introduced in the previous post. The reason for this is that WordPress is no longer processing each page request if the page cache is hit. Generally, this means that cron will not fire until the page cache expires. If you have have configured the cache to expire after 60 minutes this may not be an issue, however, if you are caching for longer periods of time this may become problematic. Other issues can arise on high traffic sites, where full page caching isn’t an option. This is due to needlessly checking the cron queue on every single page request, which is very inefficient.
To overcome these issues it’s advised that cron is configured using the system daemon (background process), which is available within Unix based systems. Because cron runs as a daemon it will run based on the server’s system time and no longer requires a user to visit the site. Before configuring cron it’s recommended that you disable WordPress from automatically handling cron. To do so add the following line to your wp_config.php file.
define('DISABLE_WP_CRON', true);
Introducing crontab
Cron events are added to a text file called crontab and each line within the file equates to a single cron event. If your server hosts multiple sites you will need one entry per site.
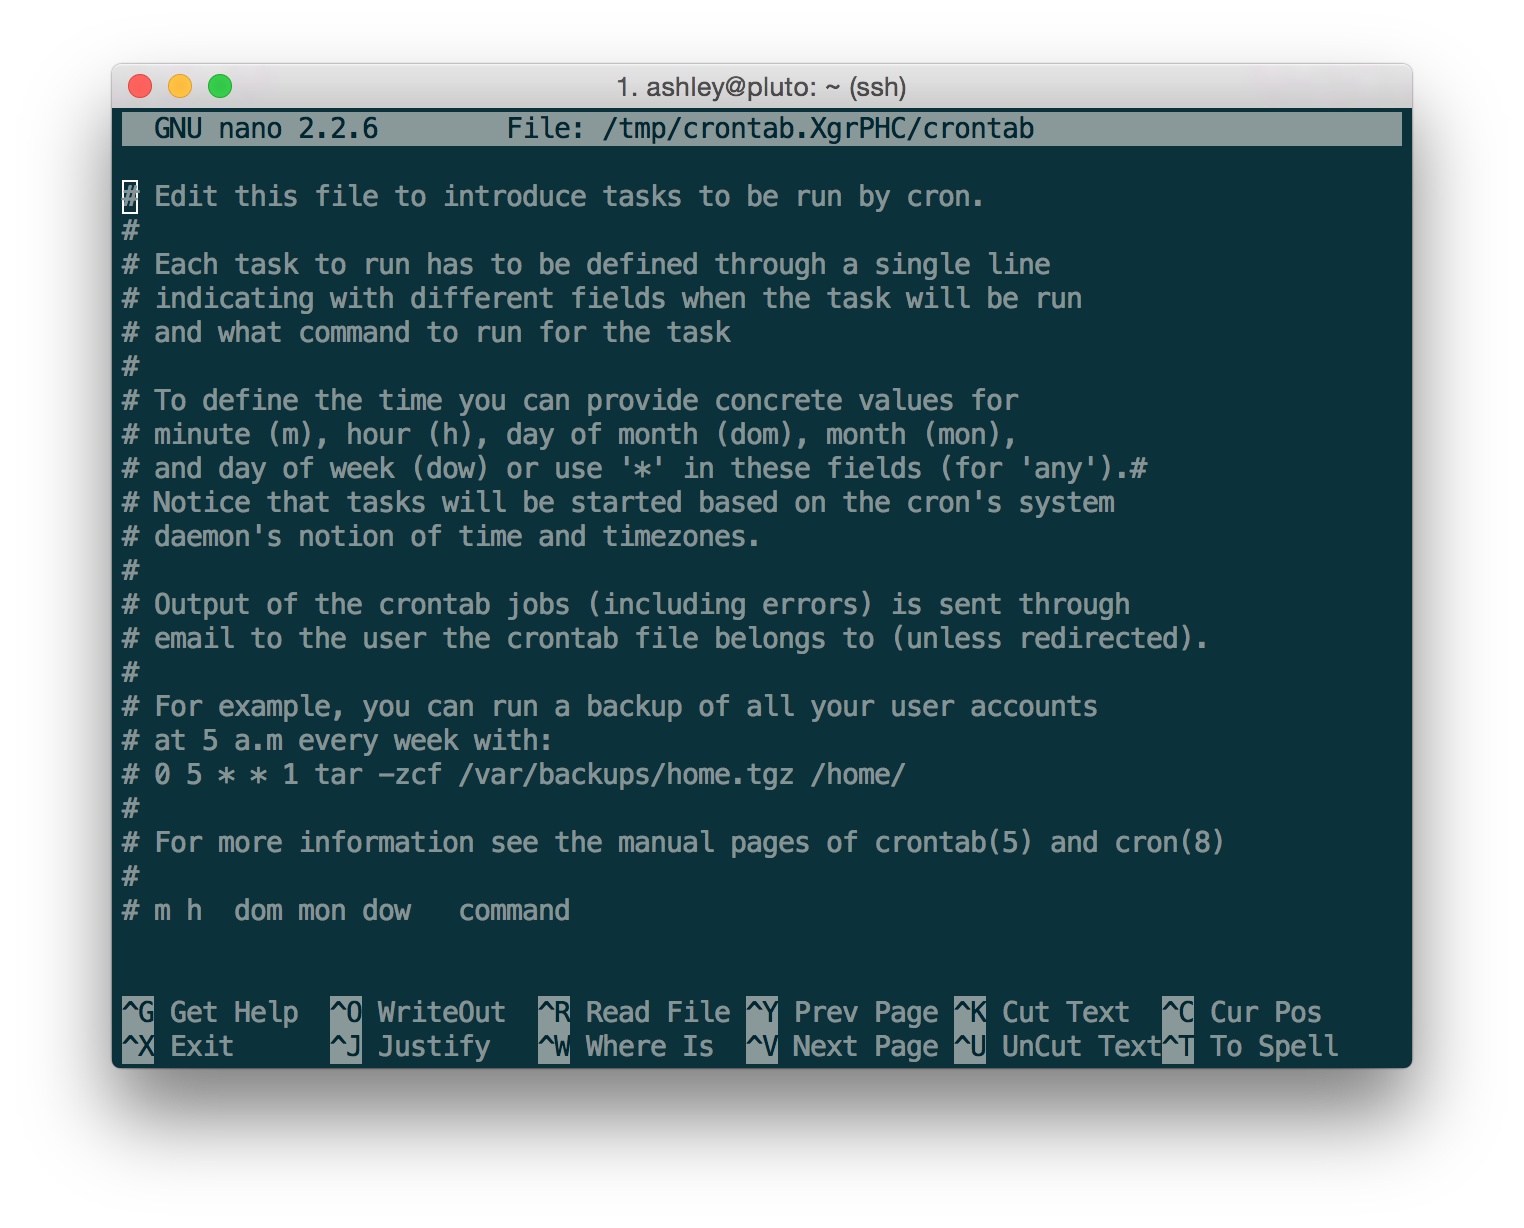
Begin by connecting to your server with your wordpress user. Then open the crontab using the following command. If this is the first time you have opened the crontab, you may be asked to select an editor. Option 2 (nano) is usually the easiest.
crontab -e
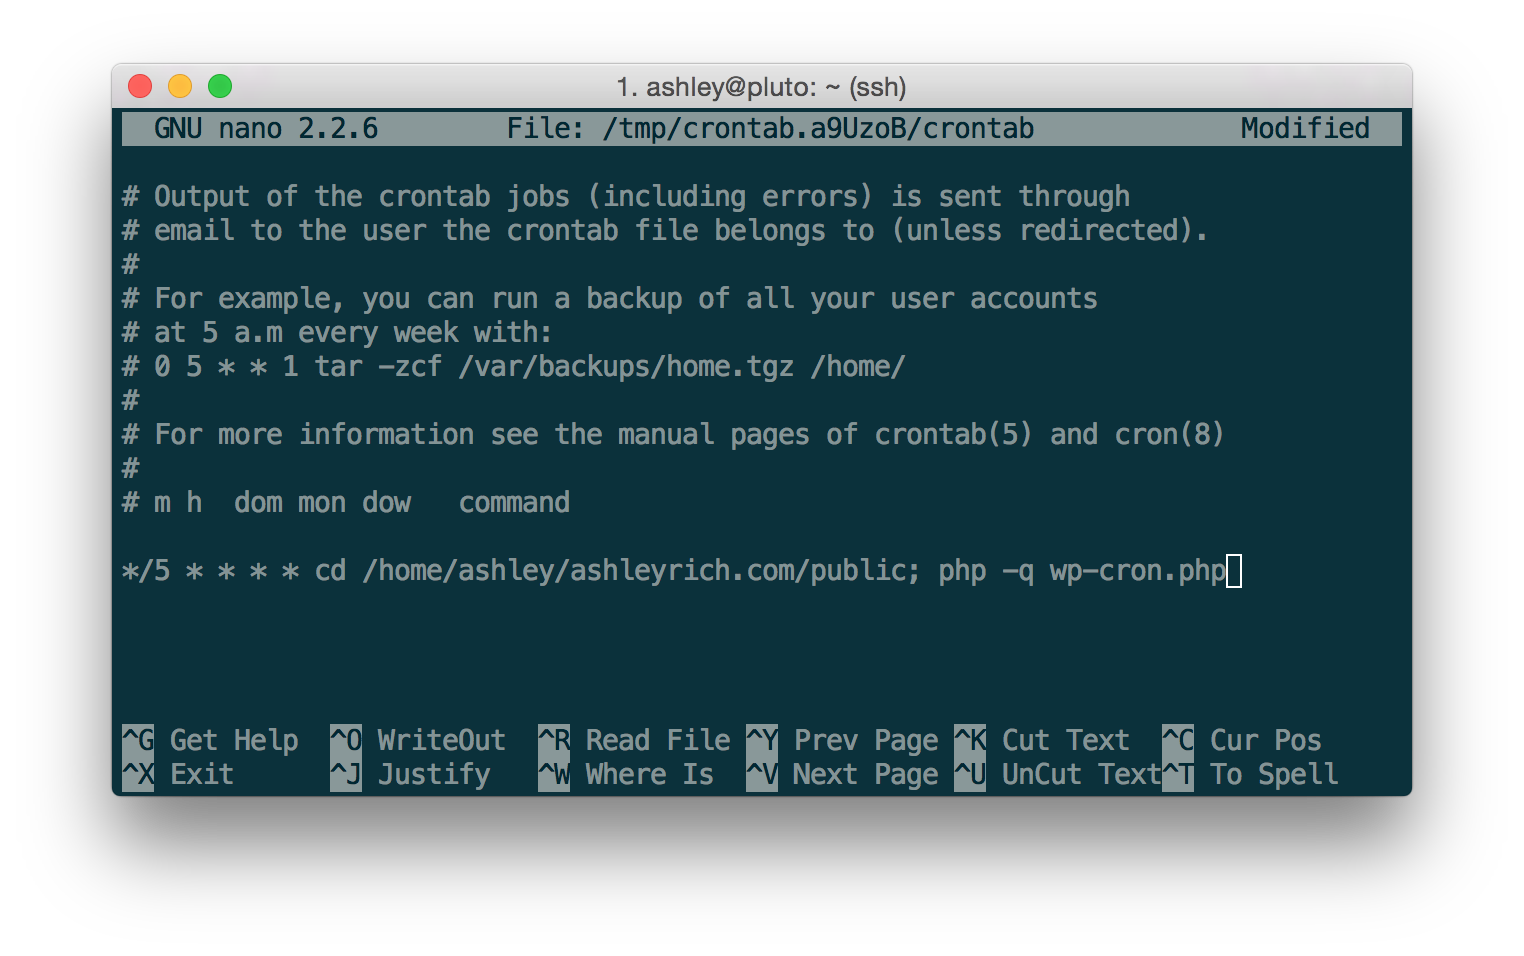
I’m not going to go into detail on the crontab syntax, but adding the following to the end of the file will trigger cron every 5 minutes. Just remember to update the file path to point to your WordPress install and that each site has a separate entry.
*/5 * * * * cd /home/ashley/ashleyrich.com/public; php -q wp-cron.php >/dev/null 2>&1
Some articles suggest using wget or curl for triggering cron, but calling PHP on the command line is often more flexible. The reason for this is both Wget and cURL are bound to the same timeout limits as normal user requests. However, in some situations you may want your cron jobs to run for longer periods of time, for example if you’re performing background processing. By default CLI scripts have no timeout limits and will execute until complete.
You may be wondering why I cd into the directory and then run wp-cron.php. This is due to how older versions of WordPress used relative paths for including files, as seen here. The following should be safe to use on WordPress versions 3.7 or later:
*/5 * * * * php -q /home/ashley/ashleyrich.com/public/wp-cron.php >/dev/null 2>&1
The >/dev/null 2>&1 part ensures that no emails are sent to the user account initiating the cron job.
Save the file by hitting CTRL X followed by Y.
Cron is now configured using the Unix native cron tool, but I’ll demonstrate how to check it’s running correctly later on.
Configure basic Email
We found 3 major options:
- sendmail: well known but not easy to configure
- exim4: well known, easy to configure for our purpose
- postfix: well known, configuration not very complex but also not very easy
Of course we are going to use exim4 which seems to be best suited for our purpose. And luckily it was allready installed on our system. However, here is the installation guide that we used:
Here is the brief procedure:
sudo apt -y install exim4Configure your hosts file
sudo dpkg-reconfigure exim4-config
Here are the settings for our server. For your installation it may be different:
Installation type: mail sent by smarthost; no local mail
System mail name: machinimatrix.org
Allowed ip-addresses for incoming: leave as default
Destinations served by our installation: leave as default
Visible domain name: machinimatrix.org
Outgoing smarthosst: full qualified hostname of our mail server
keep #DNS queries minimal: no
Split configuration into small files: no
Root&Postmaster recipient: gaia – the user who handles system notifications coming in as email
Now the configuration is finished and you only need to make sure that your mail server accepts incoming mails from your wordpress server.
Tip: For postfix it seems to be sufficient to add the server ip of the wordpress server to the mynetworks parameter
mynetworks = ip-adress-of-wordpress-server/32
Getting Secure connections
HTTP/2 is the latest version of the HTTP protocol and can provide a significant improvement to the load time of your sites. There is a complete article on the subject, which explains the benefits in more detail. In short, there really is no reason not to enable HTTP/2, the only requirement is that the site must also be served over HTTPS:
HTTPS
HTTPS is a protocol for secure communication between a server (website) and a client (web browser). It ensures that all data sent between the devices is encrypted, and that only the intended recipient can decrypt it. Without HTTPS any data transmitted will be sent in plain text, allowing anyone who is eavesdropping to read the information. HTTPS is especially important on sites which process credit card information, but has gained widespread adoption over the last couple of years. This is partly due to Google announcing it as a ranking signal, but also due to the introduction of Let’s Encrypt, which provides free SSL certificates.
Obtaining and installing SSL certificates used to be an arduous task but Let’s Encrypt and the Certbot client make the process a breeze. However we already have our certificate so we just need to get it installed oin the serverside. And that is quiet easy to do.
Moving the cert in place
In principle we can move the certificate anywhere but there is actually a default location for this:
cd /etc/ssl
ls
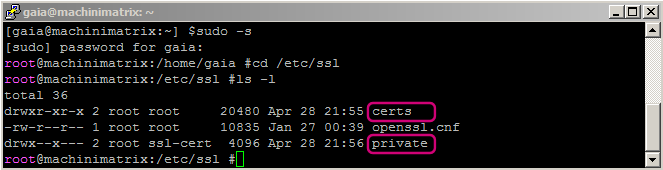
While this is not strictly necessary we will move the private key to the private folder and the certificate to the certs folder. For installing a certificate to nginx please refer to the documentation at
http://nginx.org/en/docs/http/configuring_https_servers.html
Installing the Certificate
Open the site’s Nginx configuration file:
sudo vi /etc/nginx/sites-available/www.machinimatrix.org
Add/replace the following directives within the server block, replacing the file path with the one you received when obtaining the certificate. Note:
- The
ssl_certificatedirective should point to your certificate file in the certs folder - The
ssl_certificate_keydirective should point to your private key file in your private folder (see above):
replace
listen 80;
isten [::]:80;
with:
listen 443 ssl http2;
listen [::]:443 ssl http2;
ssl on;
ssl_certificate /etc/letsencrypt/live/pluto.ashleyrich.com/fullchain.pem;
ssl_certificate_key /etc/letsencrypt/live/pluto.ashleyrich.com/privkey.pem;
Note: The http2 value is all that is needed to enable HTTP/2 support.
Save and close the file by hitting CTRL X followed by Y. Before reloading the Nginx configuration, ensure there are no syntax errors.
sudo nginx -t
If no errors are shown, reload the configuration.
sudo service nginx reload
Note: If you see a notice about http2: nginx: [emerg] invalid parameter "http2" then your nginx installation is too old. In that case you can try:
sudo apt upgrade nginx
and then try again.
Now if you visit your site in the browser using HTTP you should receive an empty response. However, when visiting using HTTPS the site should successfully load and show the green pad lock icon in the address bar. If the site times out, remember to ensure that you have opened port 443 on your server firewall!
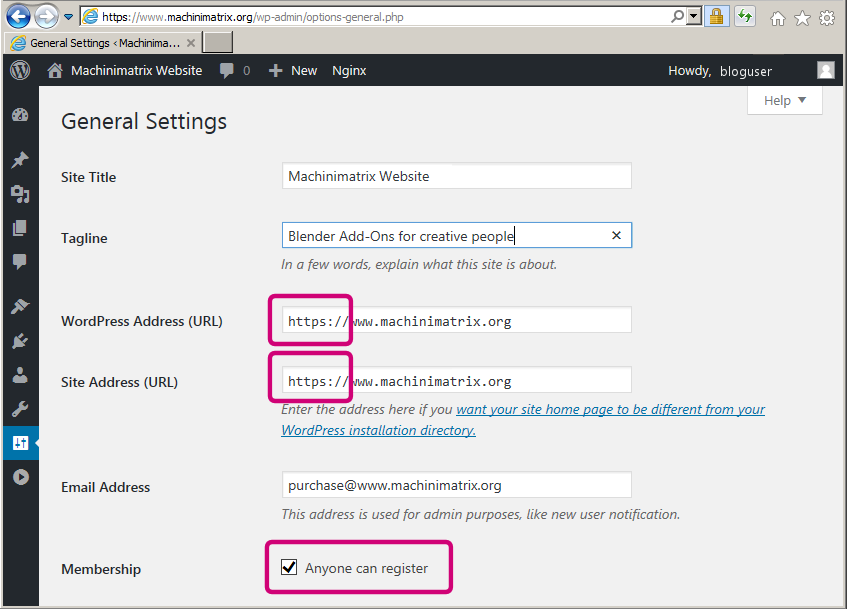
The final step is to update the WordPress address and site URL. The easiest way to do this is by login in to your wordpress blog as admin user, then open the general settings page and change the site url from http to https:
Redirect HTTP Traffic to HTTPS
At the moment all HTTP traffic is dropped by the server. Instead you should redirect all HTTP traffic to HTTPS. Open the site’s virtual host file and add a new server block below the existing one:
server {

listen 80;

listen [::]:80;

server_name pluto.ashleyrich.com;
return 301 https://$server_name$request_uri;
}
Reload Nginx for the changes to take effect, but remember to test the configuration first. Now you should be redirected to HTTPS when visiting the site via HTTP.
SSL Hardening
Although your site is configured to only handle HTTPS traffic it still allows the client to attempt further HTTP connections. Adding the Strict-Transport-Security header to the server response will ensure all future connections enforce HTTPS. This article by Scott Helme gives a more thorough overview.
Important: the following configuration directs the user browser to only accept https for your website for a defined amount of seconds. In the line below this means the browsers will refuse to use http on your website for a year!
There is a very serious downside to this setting:
If you decide to switch to another certificate, or you decide to go back to http only or do any other change on your certificate, then you will exclude all your users who have been accessing your site for the past 365 days. We are sure that you do not want to do this!
So please either add this line only after you have fully setup your blog and when you are absolutely sure that you want to not change your certificate in any way.
Open the site’s virtual host file and add the following directive to the https server block (the first one in your configuration):
add_header Strict-Transport-Security "max-age=31536000; includeSubDomains" always;Please Consider to begin with a much smaller max-age and only increase it when you are sure you realy want this!
You may be wondering why the 301 redirect is still needed if this header automatically enforces HTTPS traffic: unfortunately the header isn’t supported by IE10 and below.
Check your Nginx config and reload if successful.
sudo nginx -t
sudo service nginx reload
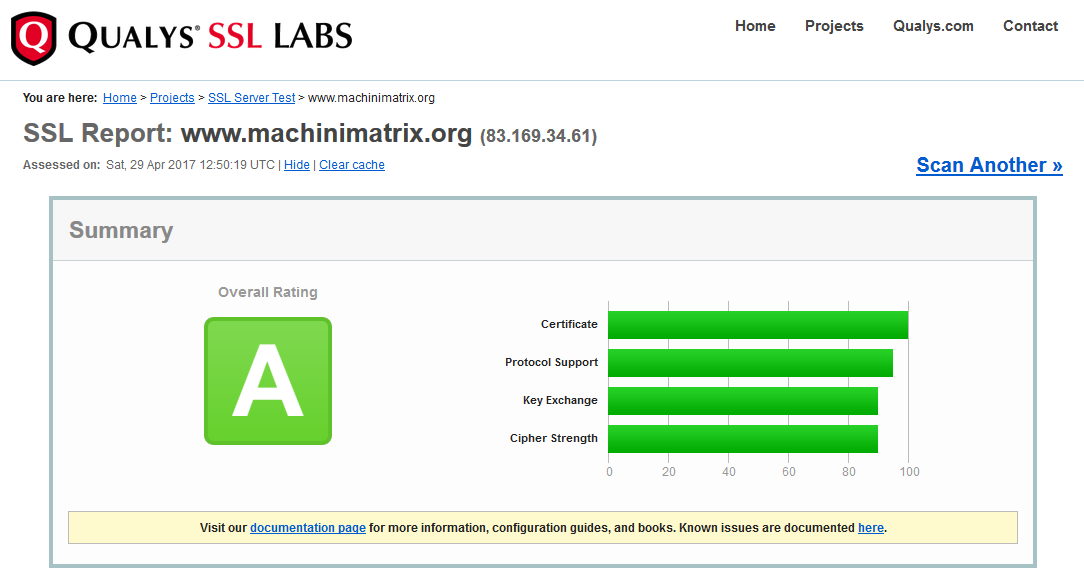
Now if you perform a scan using the Qualys SSL Test tool you see this: