You find the Sculptie Creation entries right inside the Add menu tree:
SHIFT+a -> Mesh -> UV Shape -> {Shape}
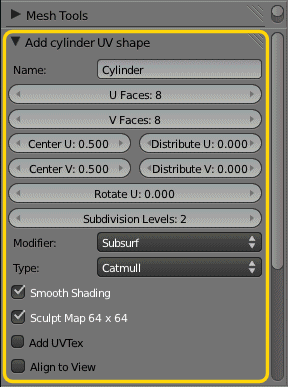
Right after creation you will find a new entry in the “Tool panel” named “Add xxx UV Shape”, where “xxx” denotes the name of the just created shape. This is a set of parameters which can be interactively customized for the current action (creation of a new object here)…
Following shape types are supported:
Please note that as soon as you start the next action (edit the object for example, or modify it in object mode) the operator panel will disappear and it will never reappear! So the complete set of settings can only be applied right after creating the object!
Hint: As long as you do not change any other settings of the object you have a chance to actually get the Operator panel back by pressing F6. The Operator Panel reappears in a popup window and it still accepts changes of the settings.
Operator Panel Parameters:
- Name
(default: Name of created shape):
The Object name. If you change the object name here, then the Object name will also be given to the associated sculptmap. Note that you can change the Object name at any time later, but then the Sculptmap name will not be affected by the name change.
Affects:
- Object Name
- Mesh Name
- Sculptmap name
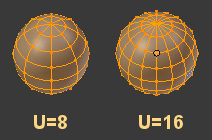
- U Faces
(default 8, not available with Bricks):
The value range depends on the basic shape type (see reference table below)
The number of faces in the horizontal direction of the Sculptmap.
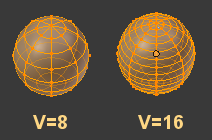
- V Faces
(default:8, not available with Bricks):
The value range depends on the basic shape type (see reference table below)
The number of faces in the horizontal direction of the Sculptmap.
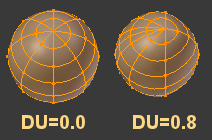
- Distribute U
(range: [ -1.0 .. 1.0 ], default 0.0) :
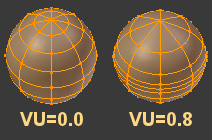
Creates a modulation of the face density. The center point of the density change is Center U (see above) Negative values push the face density away from the Center point (towards the edges when you use a plane), while positive values push the face density towards the Center U. The default value of 0.0 is the neutral position (no modulation).
Note: The warnings about “U vertices compacted” come up when there’s not enough color range at the ends to fit all the faces if the sculptie was immediately baked. It doesn’t automatically mean that the values should be changed, it’s just a warning that part of the mesh will need editing to bake correctly.
- Center U
(range: [0.0 .. 1.0 ], default 0.5):
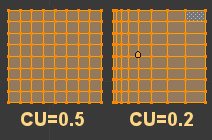
Center of density change along the U-axis. When you move the Center along the U axis, you see how the faces get compressed on one side and inflated on the other side. The default value of 0.5 is the neutral position which yields a uniform density. Note that the face density is also changed by the parameter Distribute U (see below). You can see best what happens when creating a plane.
- Depth, Heigth, Width
(default: 1,1,1, Only for Bricks):
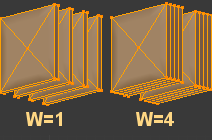
Defines the number of faces on each axis of the bricks. The number of actually created Bricks depends on how many faces are used on each axis (and on the subdivision level)
- Rotate
(default 0): [ -360 … +360 ] unit = degrees
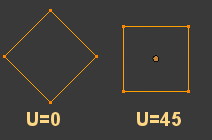
Rotate the faces along the U axis in the Sculptmap. Imagine you would shift the entire Sculptmap to the right.Whatever is shifted off the image on the right side will be appended to the left side of the image, hence actually you shift the vertical seam from far left (0) to far right (360) along the sculptmap image. And that translates to a rotation of the Sculptie in the 3D view.
Note: Torus and Ring shapes also allows a rotation of the UV faces along the V axis
- Subdivision Levels
(default: 1 for Bricks, 2 for all other shapes): range: [0…]
depends on the basic shape type and the values of U,V (see below)
Depending on the Modifier setting below this is the number of Subsurf layers or Multires layers to be used.
Notes:- Each Subdividion level actually doubles the number of faces in U and V, so you get 4 times more faces with each level.
- If subdivision level is set to 0 (zero), then no modifier is created.
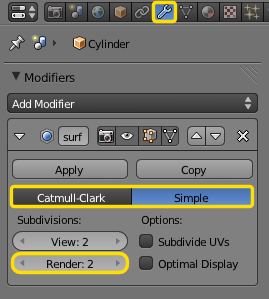
- Otherwise you find the modifier in the Modifer Stack (see image). There you can also modify the Subdivision level (and all oher parameters) at any time during your modelling.
- You can change the subdivision level separately for the 3D View and for the Render. But note:The Sculpty bake Tool only takes care about the Setting of the “Render” Value.
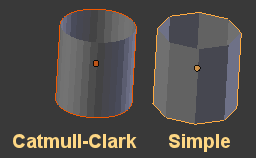
You also can change the subdivision type from Catmull-Clark to Simple at any time during your modelling. You even can apply the modifier if you want or entirely remove it.
- Modifier
(Default Subsurf): [ ‘Subsurf’ | ‘Multires’]
Create a modifier of the specified type. Note: If Subdivision Levels is 0 (zero) no modifier is created.
Hint: Due to a different implementation of Multires in blender-2.5 currently the usage of the Multires feature is very questionable.
- Type
(default: Catmull): [ ‘Catmull’ | ‘Simple’ ]
Defines how the subdivisions are calculated. The type “Simple” just adds more faces without modifying the original shape. The type “Catmull” creates rounded surfaces.
- Smooth shading
(default: enabled)
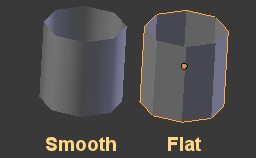
enabled: The Vertex Ligting Algorithm is used to create Shading comparable to OpenSim Shading. Hence the borders between 2 faces will become very smooth and you can hardly see that it is made out of plane faces.
disabled: Each face reflects the same amount of light across its entire surface and thus the object looks more “blocky” because you can see the individual faces.
- Sculpt Map
( default: Enabled):
If enabled creates a UVTexture named “sculptie” along with the object
If disabled no “sculptie” UVTexture is used (reserved for non sculptie usages)
Important: If you disable this option, your Object will not be prepared as a Sculpty and it will not be automatically UV Unwrapped.
However you can change this later by using the “Sculptify Objects…” function.
- Add UVTex
(default: disabled):
If you plan to model and texturize your object in Blender, then you should add a Secnd UV Map for your surface texturing. This allows you to separate sculptmap baking from texture baking (This is highly recommended!). Please consider to add this UV Map now, unless you already know that you won’t texturize your Object with Blender.
Note: Of course you can add this extra UV Map later in your working process. Just take care to name it “UVTex”. Then Primstar will recognize it as the UV Map for the surface texture and treat it accordingly during export to your virtual world (e.g.: OpenSim).
- Align to View
(default: Disabled)
If enabled, the object will be aligned to the current view. In practice the object gets rotated such that you look on it from “above” from the current view.
- Location
(default: Location of 3D Cursor)
You can place the object at any location you like. Of course you can also move the object later during your editing. - Rotation
(default: No rotation)
You can rotate the object to any rotation you like. Of course you can also move the object later during your editing.
These Parameters are default Blender Parameters. They are not very important for the just created Object and you can rotate and translate your object at any given time during your modelling.
The parameter values for U,V and Subdivision Levels highly depend on each other. Also the value ranges for U and V depend on which basic UV-Shape has been selected. The operator panel tries to prevent you from setting values out of their range and where it fails to prevent you from setting wrong values it still issues warning messages.
default parameters |
|||||||||||||||||||||||||||||||||||||||||||||||||||||||||||||||||||
|
(1): The minimum value of U and V depends on the selected Basic shape type.
(2): Bricks have Depth, Height and Width instead of U and V.
|
||||||||||||||||||||||||||||||||||||||||||||||||||||||||||||||||||
About the Curve Parameters |
|
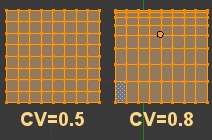
| The face density of a default Sculpted prim is uniform along U or V. If we look at the simple plane, we see that all faces are rectangles of the exact same size. The two “Center U/V” and “Distribute U/V” can change the density along U and V. The Center values can be seen as control points which define from where the density changes start. | The distribution adds another modulation around the center point, where positive values push the maximum of the density away from the center point location (towards the outer edges), while negative values push the maximum of density towards the center location.
Note: This behaviour is exact when the center is in the default location (at 0.5) but deviates when it is located near the extreme values (0.0 and 1.0) |
| Here are some examples for different values: | |
uniform density (default) |
highest density in one corner: |
Highest density at edges: |
highest density in center: |
Create from Basic Library
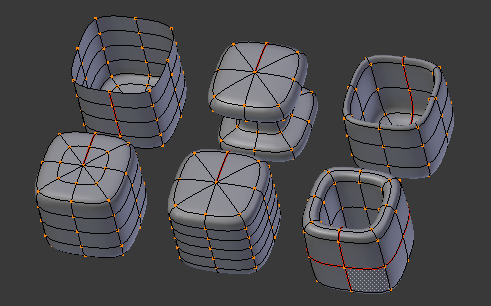
Besides the basic shapes we have added a small library of “special” Objects. All creation parameters (U, V, Levels of Subdivision, …) can be modified for these shapes similar like we have described above for the basic shapes. Right now the collection contains following shapes:
|
 |
