SLS-1 The Avatar and its Mesh
Free PreviewAt the end of this course you have gained fundamental knowledge about constructing rigged meshes (characters and attachments).
Prerequisites for this lesson
- You have an account in Second Life or in OpenSim.
- You have a pose stand that can pose your character into the T-Pose.
- Your Viewer is capable to download your avatar shape in .obj format1, e.g. the Singularity Viewer
- You have installed a 3D modelling tool that is capable to export Collada files which are compatible with Second Life, e.g. Blender
1: For Blender users there is a much easier way to get your current Shape from Second Life into Blender. Please take a look at our Avastar Addon which is capable to import regular Second Life Shape files (avatar shape in XML format)
Your initial skills
Basic knowledge in 3D Modelling
At end of Lesson
Detail knowledge about the SL Avatar’s inner structure.
The Shape Sliders
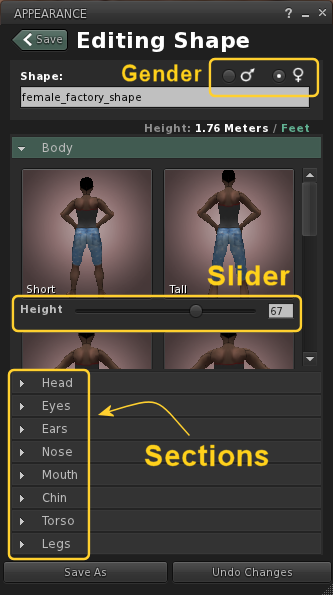
You most probably know all of this already. You change your character’s shape in the Appearance Editor
- Here you find about 120 sliders for squeezing and stretching all parts of your avatar’s body.
- Each slider can be set to integer values in the range [0, 100]. Thus you can set each slider to 101 possible values.
- The Sliders are grouped into Body sections.
- At the top of the editor you can switch the Gender of your character.
- You can store the slider configuration into Shape Objects.
- New Shape objects are always preset with the Avatar default Shape. (a female shape)
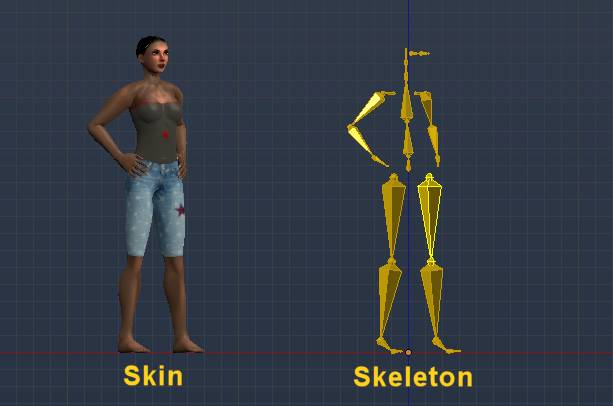
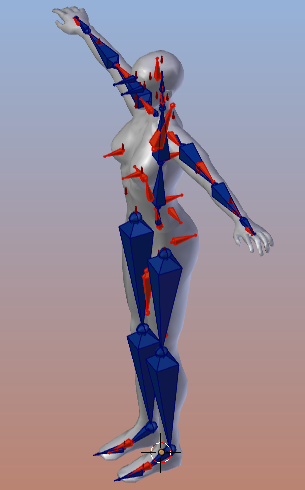
It is important to understand that the bones are not meant as visual elements. In fact the bones are Control handles for manipulating the mesh. So the Skeleton that you see in the image above is just a “visualization” of those control handles.
Note: In 3D modeling meshes which are controlled by a Skeleton are also named Skins. So in order to follow this notation i will refer to the character’s mesh as the character’s Skin in the rest of this course.
In this course i will explain how the shape sliders and the bones control the character’s shape and what that implies for your own attachments and character creations.
Two Types of Shape sliders ?
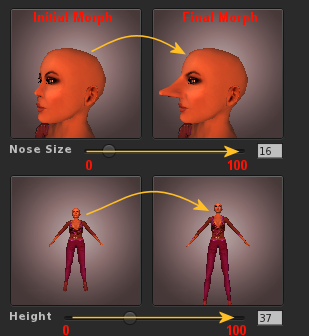
When you play a bit with the Shape editor, you will quickly realize that some of the sliders change the Avatar-skeleton, like for example the slider for the character height or the arm length slider.
Other sliders only modify the volume of the mesh but they preserve the bone-sizes. For example this is so for the torso muscles and for almost sliders for the face.
This difference in the slider’s behavior has some very important implications for our own custom characters and attachments. That is:
Sidestep: Inspecting the Shape Sliders
Second Life has no nice way to show how the shape sliders interact with the Skeleton. However here is a little mini tutorial for Blender for creating a mesh character that shows how the skeletal bones interact with the Slider system in Second Life:
Create a “Mesh skeleton”
We want to see what the Skeleton does when the mesh sliders move. For this purpose i have created the stickman.blend file (and the stickman.dae file for those who do not have Avastar)
The Stickman is a replica of the SL Skeleton itself. It is already weighted, so that you just can export it(*) , import it to Second Life, wear it and run around as Blender Armature.
(*): You need Avastar to export the stickman.
Note: The yellow skeleton in the image above is a mesh. I created this mesh only(!) because in SL we can not directly see the Skeleton. Thus i faked a skeleton visualization with this Avatar. As a sidenote: Blender’s animation system creates bones which look very similar to what you see in the image above. But we will see later that skeletons (bones) are separate items which are not defined as Mesh objects.
Create “wireframe” Alpha textures
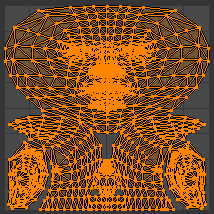
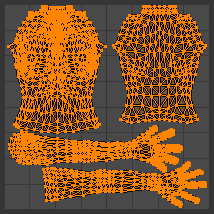
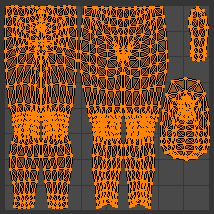
With Blender: Grab the Avatar mesh, then for each part export the UV Layout with an Opacity of 0%
Here is the procedure for the Head mesh:
- Select the Head mesh
- go to edit mode
- Ensure that all vertices are selected
- open the UV Editor
- UVs -> Export UV Layout
- In the operator Panel set
Fill Opacity = 0.0 - Export as .png

Eyes

Head

Upper Body

Lower Body
After you have created the images, upload them to Second Life. Of course you can use the images provided above as well, (with Firefox you can use RMB -> save image as…) But you also should be able to create these images on your own.
Create the wireframe Alpha mask in Second Life
Now wear the Alpha mask and in the inventory:
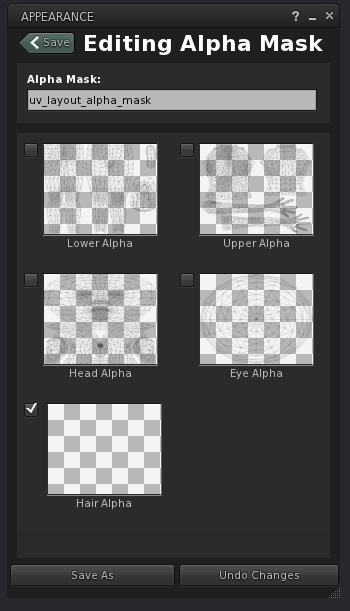
In the appearance Editor you can add the just uploaded images. Note that i have enabled the tickmark for the Hair Alpha instead of providing an Alpha texture here. we don’t care about the Hair wig anyways.
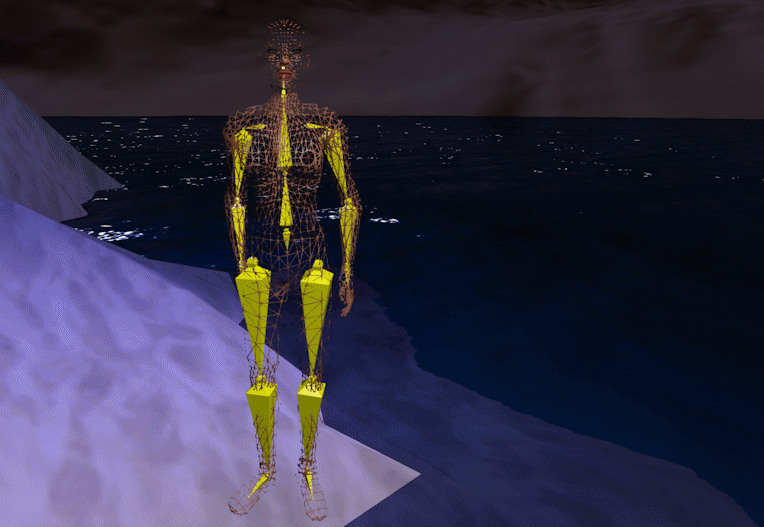
Ensure that you wear the alpha mask, then detach all clothes and all mesh attachments from your avatar, and wear the Mesh skeleton that we added in the previous step.
Hello, World on a Wireframe1
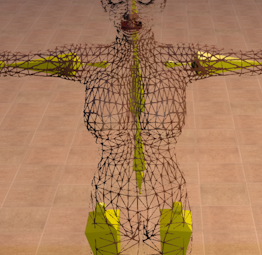
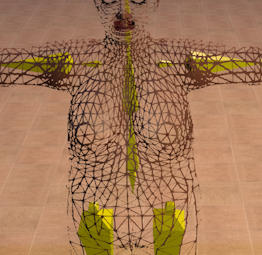
Now you can go into your Shape editor and play with the Sliders to see which sliders affect which parts of the Mesh and the Skeleton. But hold on, there is a caveat here. I suggest you take a moment and try to see that caveat by yourself by playing with the sliders.
Hint: With Second Life you always have to expect the unexpected. Now what is the caveat ?
1: The chapter title is a reminiscence of the German film World on a Wire.
 Mesh: trouble ahead!
Our goal is to create cool and good looking Meshes and attachments. If you have played with the Stickman Avatar (see above in the toggle box) then you might have stumbled over this already (but its easy to overlook, so don’t worry if you didn’t notice it):
However… lets keep all of that aside. We will see shortly in greatest detail what happens and why it happens.
The Anatomy of the SL Avatar
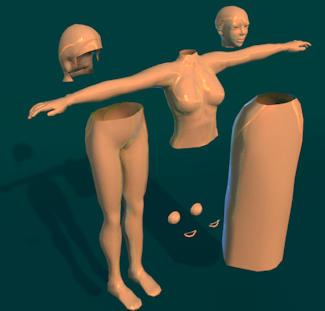
I have prepared an exact clone of the Second Life character. This is a mesh that has all properties of the Second Life avatar. But it lives in my modelling tool (Blender). This mesh has been generated from the Avatar Definition Files in the SL Viewer. Thus it is by all means the same character as used inside your SL viewer. So, all that i tell you from here on is exact information about the SL character as well.
First we see that this character is separated into 8 parts:
- Head
- Upper body
- Lower body
- 2 separate eyes
- Eye brows
- Skirt
- Hair Wig
The Hair Wig is mostly not used for any practical work (although i can see it to be of value when you create customizable mesh hair). We will ignore the hair wig. And for now we will also keep the eyes and eye brows aside. we will get back to the eyes later when we talk about animation.
The Meshes
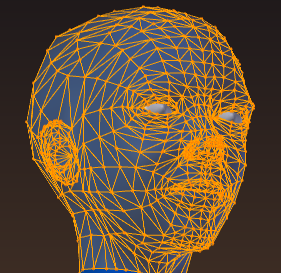
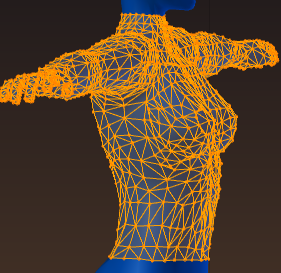
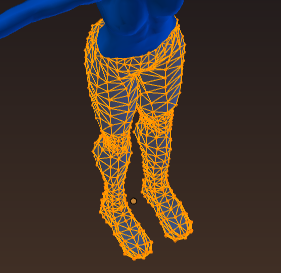
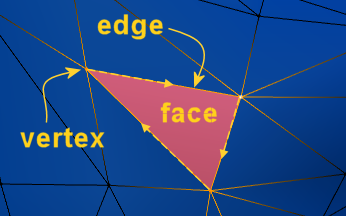
Each part of the character is made out of a mesh, that is a set of vertices (orange points in the images below), connected by a set of edges (orange lines). The holes in this mesh are filled with faces (blue surfaces) and all faces together define the character’s surface (or skin). Here you see the 3 body part meshes rendered in orange and the skin rendered in blue:
If you inspect the images closely then you see that all blue faces are in fact triangles (faces with 3 edges).
Sidenote: Details about Vertex, Edge, Face and Texture Face
You might already have been working with Faces in Second Life. Thus you have an idea about what a Face is.
In Second Life: A Face is an area on the surface of an object that can be textured with one texture. In second Life an object can have up to 8 Faces.
However, in 3D modelling the term Face has a slightly different meaning:
Note: Faces are basic surface elements which have no substructure. That basically means, a face can not contain any inner structure (sub faces made out of inner edges if you like so), thus you can see faces as the atomic parts of a mesh.
Polygons
Note: Meshes do not need to be made only with triangles. Meshes actually can have have faces with 3, 4, 5 or even more edges. We typically use the names “Tri(angle)” for triangles, “Quad” for faces with 4 edges, and “NGon” for faces with more than 4 edges. Also we often find the word “Polygon” as synonym for “Face”.
Face Types
- Faces with only 3 edges are named Triangles (or Tris)
- Faces with 4 edges are called Quadruples (or Quads)
- Faces with more than 4 edges are called N-Gons
- And all faces are also named Polygons independent from their edge count.
From Vertex to Model
This video explains in great detail the basics of mesh:
However, most target systems (like Second Life for example) actually only use Trangles. Luckily the conversion from arbitrary Polygons to Triangles can be made automatic (and in fact is mostly done automatic) by all 3D tools.All of this was not a big issue before Second Life supported mesh. But now we have a name clash. And in order to resolve this problem, the term Face in Second Life is often replace by the term Texture Face.
UV Maps
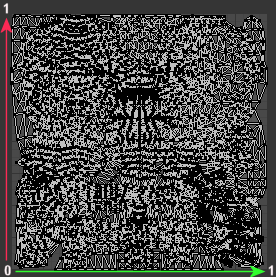
Second Life defines 6 UV Maps for their meshes. Below you find the 3 most important maps (from left to right) Head, Upper Body, Lower Body.
These UV Maps are the same for all SL Avatars and this is true for male and female as well. But most important: These UV Maps can be used to create textures which will work on the Second Life avatar (to make skin and cloth textures for example)
Sidenote: Details about UV Mapping
UV mapping is a technique that allows us to cover a three-dimensional surface with two-dimensional images. The basic idea is (slightly simplified) that the faces of an object are planar and thus you can always find a linear mapping between a face on the 3D model and a corresponding face on a flat plane. In simple words the 3D model is cut into pieces (along seams), then each piece is unwrapped onto a planar surface. The entire set of unwrapped faces is the UV Map.
UV mapping in a nutshell
So for each face of the 3D model we have a corresponding face in the 2D UV map whith the same number of edges. Thus for each of the 3D faces the corresponding UV face can be mapped by stretching and rotating the image only in 2 dimensions.
Admittedly this is a very short introduction into UV Maps, but the video should make it pretty clear how UV mapping is meant to work.
UV Mapping in a video
Why the character is cut into 3 pieces ?
However, you actually can join the parts into one single object. But then you need to work with different materials (one material for each of the joined parts) and assign each mesh face of the joined character to the corresponding part material. But this is not part of this course.
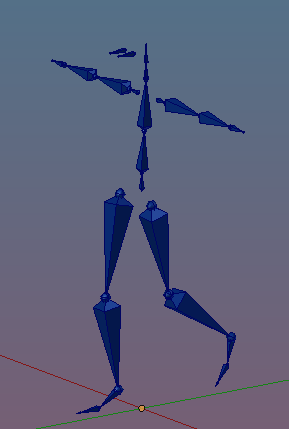
The SL Skeleton
This Skeleton is also named: The Character’s Rig. And the SL Avatar mesh is bound (assigned) to this Rig.
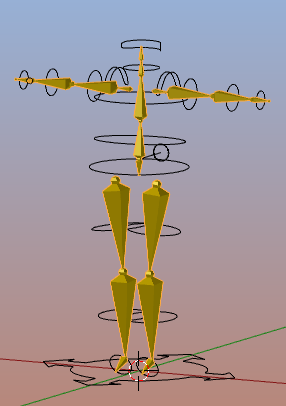
Note: In Blender the skeleton bones are by default colorized in blue. However, when you compare the skeleton in the image aside with the yellow stickman character, (which is a simple mesh, don’t forget that!) then both look very similar. Of course that is on purpose.
I have added an in depth introduction into Rigs in the sidenote below.
Sidenote: More about Bones…
The Rig’s Orientation
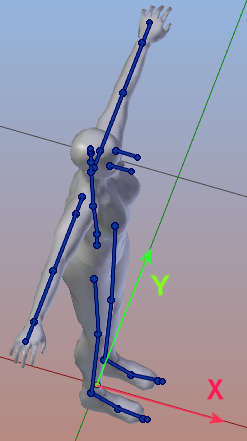
Second Life expects the Avatar to be modeled such that it looks forward along the positive X axis. Now this should not be such a big issue, but (for Blender) this restriction is awkward.
Enforce compatible symmetry
From Second Life to Blender: You can rotate the Rig such that it complies to Blender’s symmetry:
- Ensure Blender is in Object mode
- Select the Rig and all its attached meshes1
- Now rotate the Rig such that the character looks toward negative Y. For the SL Rig you will rotate along the global Z axis by -90° (Use the keyboard shortcuts: RZ – 90)
- Object -> Apply -> Rotation
- Press the NUMPAD 1 key to enter Front View
Now the character should look at you.
From Blender to Second Life: You can rotate the Rig such that it complies to Second Life symmetry:
- Ensure Blender is in Object mode
- Select the Rig and all its attached meshes1
- Now rotate the Rig such that the character looks toward positive X. For the SL Rig you will rotate along the global Z axis by +90° (Use the keyboard shortcuts: RZ 90)
- Object -> Apply -> Rotation
- Press the NUMPAD 3 key to enter Side View
Now the character should look at you.
1: If your Meshes are all parented to the Rig (are children of the Armature) then it is sufficient to only select the Rig.
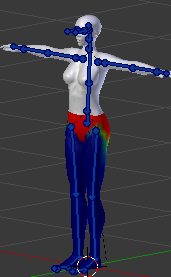
Bone Weight Maps
We will get into the details of Weight Maps later. for Blender users: You find the weight maps stored in Vertex Groups. You find more about this in Blender wiki – Vertex Groups
Sidenote: More about Weight Maps…
However, please be patient, we will get into all of this later in much greater detail. For now you only need to know that this mesh is an exact copy of the secondlife Avatar and it uses the exact same Rig as the SL Avatar. And because of this we expect that this mesh will behave exactly in the same way as the Second Life character itself.
In the next lesson we will check if this is a correct assumption. And note: What we will see next is not dependent on the modelling software that you use. Your tool must only be capable to create mesh objects and it must be able to export your meshes to the Collada format.
I am wondering why your screen is so bright and you can see the mesh body properly and why mine is dark
Also what points to I actually really have to remember from this lesson.
Hi when I import the object files they appear sideways in avastar. How do I fix this..I have tried the rotation menu option though cannot actually rotate.
I hope I can come back to this after I mark it complete
Sure. You also can reset the mark at any time if you like.